

Heyyy friends!! I’m so excited you’re here because in this blog I’m going to be sharing how I use Lightroom! This is the software I use when editing all of my galleries and I absolutely LOVE all of the options. Editing in lightroom is a great tool for anyone who may be interested in photography and wants to have more editing “power” when it comes to how your final image will come out.
The desktop version can be purchased online for $9.99/month however, the mobile app can be downloaded and used for FREE!! Follow along to learn some helpful “tips and tricks”, and see a video of how I edit a photo from start to finish!
First Things First
While lightroom is a great tool to have, there are a few things it can NOT fix. For instance: an out of focus photo and/or a photo taken in “bad light”.
Too often I see people try use a preset (basically a premade edit settings) thinking it’s going to be a one click wonder. Even if you are using a preset, they don’t fix either of those two problems. I personally don’t use any presets. I have bought some in the past, but saw that I was still basically editing everything anyway so why not learn along the way and create my own based on what I do to each photo ~ which reminds me, I still need to do that LOL.
Nonetheless, editing in lightroom can work wonders on an image! A quick beforehand tip – always shoot in RAW vs JPEG. You have more editing capabilities when you’re shooting in RAW because it holds more data from the image (also making it a larger file size).
What to Expect
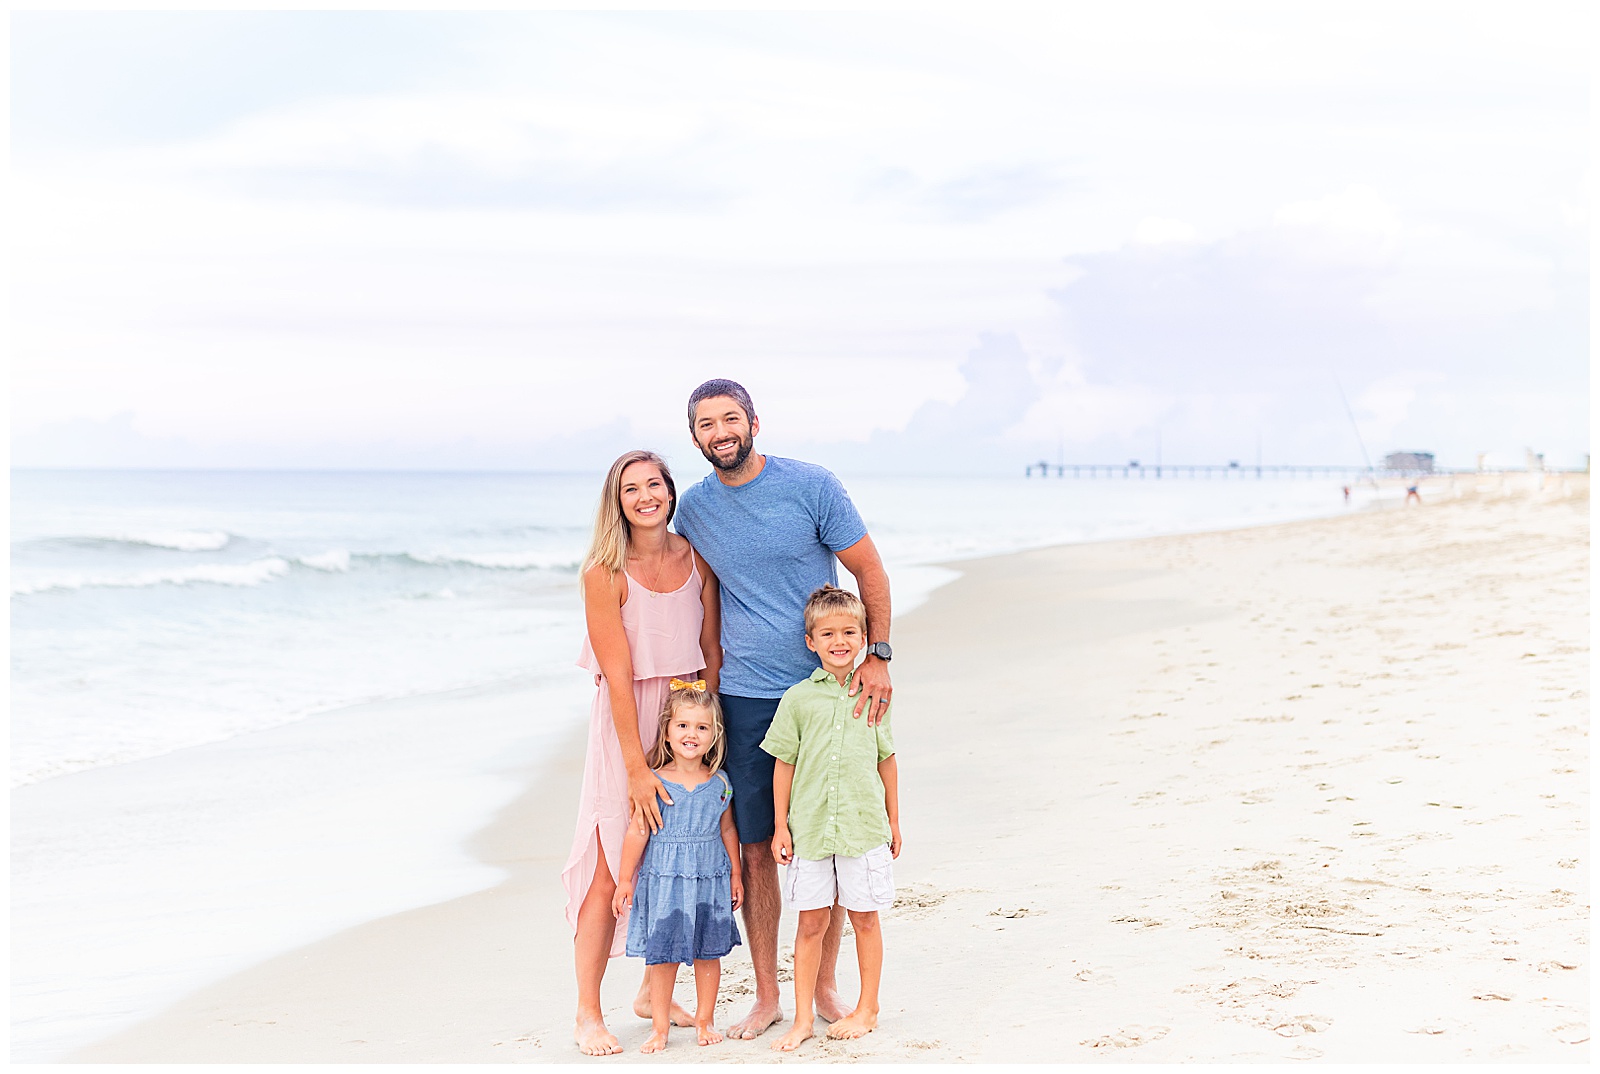
In this video you’ll get the chance to see me edit a photo from straight out of camera to the final image that I deliver. I’ll go through and show you how I go from this > to < this!!!

This photo is from an engagement session last fall in Colonial Williamsburg. We began our session around sunset which is called “golden hour” and produces beautifully lit images! However, as you can see from the image on the left, there is still editing that needs to be done.
Below is a list of the key adjustments I make during the video. I also included a small description of what is changed and why it’s important. I’m a visual learner alllll the way so hopefully the added photos of the lightroom settings help as well!
White Balance – the original image was too “cool” (or blue) so I “warm” it up by moving the original temperature
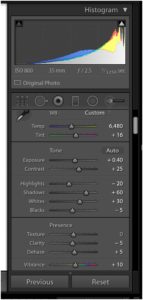
from 5550 -> 6480.
Increase exposure – each lighting scenario is different depending on the location, time of day, etc. With this particular photo it was backlit (meaning the sun was behind the couple) and needs to be brightened up. Here I increased the exposure by +40.
Shadows – I am always greatly increasing my shadows in editing. My photography style includes bright images and rather than overexposing by increasing too much exposure, I increase SHADOWS to have even light. In this image, shadows were increased by +60.
Increase the whites – you want to be careful not to increase whites too much because this can make the image look “blown out”, meaning the highlights are too overly exposed. But it can be a great way to increase the brightness of an image.
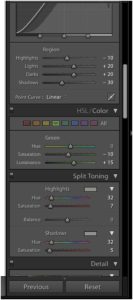 Use the tone curve – After I’ve gone through and made slight adjustments in the BASIC module I’ll go down and use the tone curve. After everything is done it always has the look of a backwards “C” meaning highlights are brought down, lights/darks are increased, and shadows decreased.
Adjust the yellows and greens in the HSL module – this is a great way to adjust specific colors in your image without using the temp/tint which affects the entire image. In this photo you’ll see how I tweaked the yellows and greens.
Show the benefits of split toning – ok so split toning is a great tool. You can use the color slider to adjust the “highlights” as well as the “shadows” of an image based on your editing style.
**BONUS** I also show how to take out unwanted “distractions” 😉 you’ll want to stick around for that one!
Video Content
I really hope you enjoy these helpful tips for editing in lightroom. Editing is just a small part of my job that I love and am so excited to share this with you all! Disclaimer – I rewatched the video and there seems to be a slight echo of some sorts, not really sure what that’s about or where it came from but I’m so sorry. It doesn’t seem to be that bad and you can still hear me 🙂 Also this was like my 5th or 6th attempt at taking this video so be kind LOL! Attempting to take a tutorial video with 4 people and two dogs home during quarantine was not as easy of a task as I imagined!! But you’ll get a kick out of it at least!
Aaannddd here it is y’all ……. Editing in Lightroom Tutorial video comin at ya!!!
Thanks so much for sticking around and checking out the blog post AND video! I truly hope this content was beneficial to y’all and you enjoyed seeing how I edited this photo. If you’d like to see more from this session feel free to check out Ben + Ashley | A Williamsburg Engagement blog post!
If you have any other questions or other aspects of photography you’re interested in learning about, I’d love to help! My passion for this runs deep and I always get so excited to share it with others!! Look forward to maybe sharing more in the future.
All my best,
Emily


+ COMMENTS
add a comment